Stair cover installation guide
Fiberglass Stair Cover Installation: Finished Heights and Transitions
A cover installation is complete only when the finished tread level, rise, nosing line, joints, side gaps and both landing transitions work together. Measure the actual substrate and the completed surface.
Prepared by
Dengtai Industry
Published
·
Reviewed

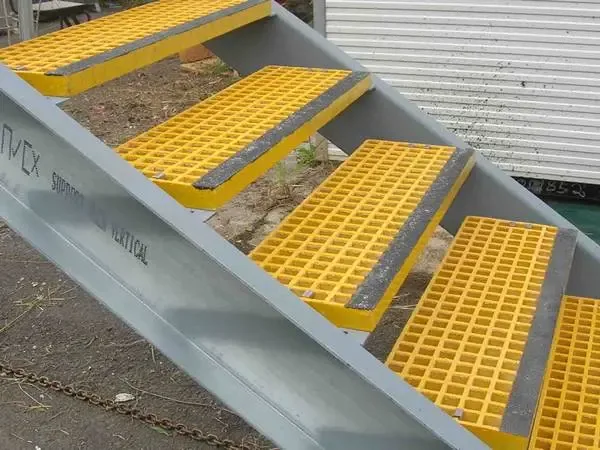
This image shows the cover surface, not the old step or landing. The installed height and transitions must be measured on the actual stair. Photo: Dengtai Industry.
Height vocabulary
Cover Thickness Is Only One Finished-Level Datum
Record the existing top, finished cover top, rise change, nosing line and landings separately.
- Existing tread level
- The walking plane of the step before the new cover is installed, measured at a named position.
- Cover build-up
- The complete layer added above the existing surface, including the cover and the actual bonding or fixing interface where that affects height.
- Finished top level
- The surface people actually walk on after installation. For patterned or textured products, confirm the plane used for the finished-level check.
- Finished rise
- The vertical distance between completed walking levels. Installing a cover changes the level of that tread relative to its neighbours and landings.
- Nosing line
- The alignment of the front edges through a flight. Projection, width and vertical level all affect how that line reads and fits.
- Landing transition
- The junction between the first or last covered tread and the adjacent landing, floor or stair component.
- Joint
- A longitudinal or transverse connection between adjacent pieces or adjoining floor areas. Its level, line and edge treatment need to be inspected.
- Side clearance
- The finished gap or contact at the wall, stringer, trim or other adjacent construction along the cover edge.
Installation release
Check the Finished Stair Before Fixing the Cover
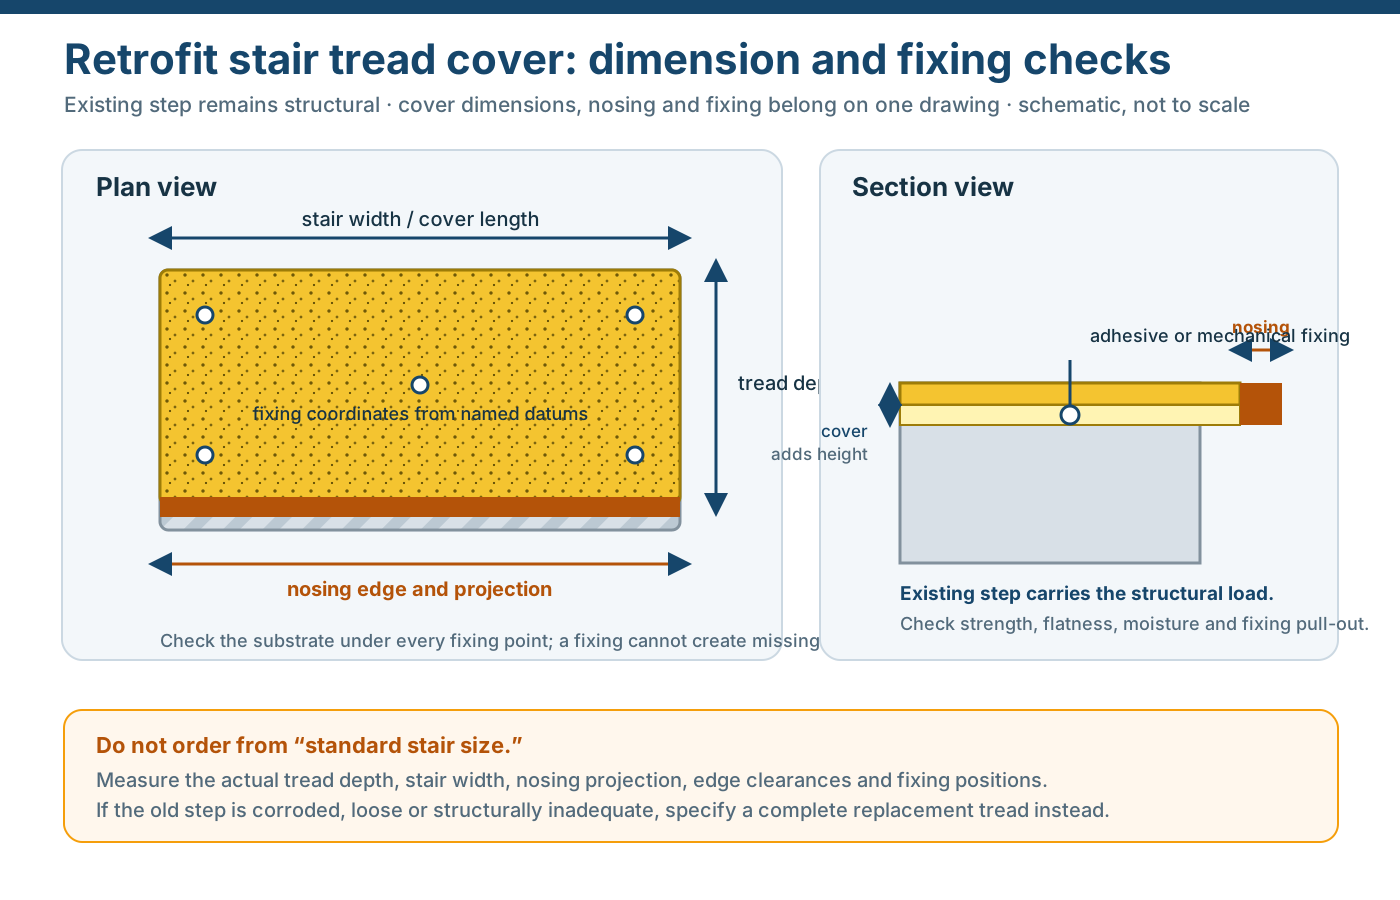
The cover must fit the existing step and leave the complete stair geometry defined.
Specify this if…
- The existing step has been confirmed suitable to receive the cover.
- The cover finished thickness and top plane are known for the proposed product.
- Rise changes and both landing transitions have been compared with the completed stair design.
- Nosing projection, joints and side clearances have been checked.
- The installation sequence includes a dry fit and a post-install height check.
Look elsewhere if…
- The existing step is damaged, loose or unable to receive the intended fixing.
- The proposed cover build-up cannot fit the doors, risers, landings or adjacent surfaces.
- Only the cover thickness is recorded and the finished rise is ignored.
- Joints or side gaps are left to be “made good” on site without a defined finish.
- The project expects a cover to correct a failed stair structure by adding a surface.
Finished-level map
What Changes When the Cover Is Installed
Read the cover as part of the completed stair, not as an isolated sheet.
Swipe horizontally to view all columns.
| Finished-stair check | What to record | Why it changes the job |
|---|---|---|
| Existing top | Uncovered walking level at the agreed positions | Establishes the base for the finished build-up |
| Cover top | Finished walking plane after installation | Shows whether the selected product creates the intended level |
| Finished rise | Completed level-to-level distance | Prevents a sequence of small cover additions from being overlooked |
| Nose line | Horizontal position and vertical alignment of every front edge | Controls visual continuity, projection and transition fit |
| First transition | First covered tread to top landing or floor | A partial installation can create a lip at the landing |
| Last transition | Last covered tread to bottom landing or floor | The final step must still work as a complete stair |
| Joints | Location, level, gap and edge detail | Avoids uneven joints and unplanned open edges in the walking path |
| Side clearance | Wall, stringer, trim and adjacent construction | Determines final fit and whether the edge can be inspected and cleaned |
Survey fields
Fiberglass Stair Cover Installation Heights
These values connect the substrate survey, fabrication drawing and installed result.
Request a Project Quote| Specification | Value |
|---|---|
| Substrate top | Existing walking level Measure at left, centre and right and state the datum. |
| Covered top | Finished walking level Use the product’s actual finished thickness or declared top plane. |
| Riser change | Before and after Check the complete flight and both landings, not one isolated tread. |
| Nosing | Edge, projection and alignment Show the finished nose against the riser or named datum. |
| Joints | Position, width and level Record longitudinal and transverse joints and any movement allowance. |
| Side gaps | Finished clearances State the interface and whether a trim or seal is supplied. |
| Fixing | Adhesive, mechanical or combined Use the approved product and substrate method. |
| Final record | Pre-fit and post-fit checks Keep piece marks, measurements, observations and current revision. |
Treat the Cover as a New Finished Walking Surface
A fiberglass stair cover may be thin relative to the stair structure, but it still changes the finished walking level. Every covered tread gains a build-up, and the front edge may move forward. Those changes need to be checked through the complete flight and at both landings.
Start with the current stair. Record the existing top level, substrate condition and fixing locations. Then place the proposed cover section over the same drawing and record the finished top, riser change, nosing projection and every joint. The fiberglass stair tread cover guide explains the substrate and product-selection side; this page focuses on what the installed result must establish.

In this guide
- Record the height from one datum
- Check every riser and both landings
- Resolve nosing, joints and side gaps
- Install and measure in the right order
- Know when the installation must stop
- Prepare the installation record
Record the Height from One Datum
Use the same datum for the existing surface and the proposed finished surface. A useful section records:
- the existing tread or substrate top;
- preparation or repair thickness, where relevant;
- the cover and actual fixing or adhesive interface;
- the finished walking top;
- the nosing or return below that top;
- the neighbouring riser and landing levels.
For a flat cover, the finished top may be clear. For a patterned or gritted product, define whether the finished level is measured at the backing plane, the pattern high point or another named surface. The choice has to remain consistent across the drawing and the site check.
Measure the existing top at the left, centre and right of the tread. If those values vary, record the variation and the repair strategy. A cover cannot be assumed to flatten a dished, crowned or loose substrate.
The selected cover thickness is a product value. The finished build-up is a stair value. They may not be interchangeable. Use the quotation, approved sample and drawing to confirm which thickness or finished top is being promised.
Check Every Riser and Both Landings
A uniform cover applied to every tread may still change the stair if the substrate levels differ. The installation review should compare the finished level of adjacent steps, not just the thickness of one piece.
Check:
- the step from the top landing to the first covered tread;
- the step from the last covered tread to the bottom landing;
- the completed rise at every tread;
- any abrupt transition at doors, raised thresholds or adjacent finished floors;
- whether partial covering creates an uncovered step immediately before or after the covered zone;
- handrail, door and side-clearance implications of the finished level.
The responsible stair or access designer confirms the acceptable finished geometry. The factory can supply the cover to the approved section; it should not invent a stair code dimension from the phrase “standard cover.”
If the cover cannot fit the transitions without a new lip, obstruction or abrupt height change, stop the order. A thinner product may solve one problem while failing the substrate, fixing or durability requirement.
Resolve Nosing, Joints and Side Gaps
Nosing line
A contrasting nosing marks the front edge. The finished front-edge line should be visible and consistent through the flight. Check the following on the actual layout:
- which long edge or edges have the nosing;
- how far the finished edge projects beyond the old substrate or riser;
- whether the cover return creates a sharp or rounded edge;
- whether adjacent treads use the same nosing detail;
- whether a landing uses a different edge condition.
The nosing and end-detail guide explains how to dimension the front edge, while the separate and integral nosing comparison distinguishes an applied profile from a formed cover return.
Joints in the walking surface
Joints can occur between cover pieces or at the edges of adjacent floor surfaces. A joint plan should state:
- joint location and direction;
- whether the joint is dry, sealed or open;
- how the joint level is controlled;
- whether a movement or drainage function is required;
- which edge treatment is supplied;
- how the joint will be cleaned and inspected.
Do not treat a visible gap as a harmless installation detail if the project expects a continuous top. Equally, do not close every joint with adhesive unless the approved detail permits it. The covered grating joints and drainage guide explains why a covered surface needs a deliberate water path.
On an exterior or wash-down stair, check the intended fall, edge path and joint drainage before approving the installation. Look for a pocket where water can stand against a trim, riser or landing, and confirm the approved method for getting water off the finished walking surface. Do not drill undocumented drainage holes into the stair; a field hole can cut reinforcement, expose the core or miss the intended support.
Side gaps and cover ends
Record the finished gap at walls, stringers, trims and adjacent steps. A gap can be necessary for fit or movement, but it must be dimensioned and inspected. Confirm whether it is left open, filled with a specified accessory or closed by another trade.
The cover end is also a walking-surface detail. A cut or folded edge should be supported, sealed or capped as the approved design requires. Do not conceal a loose end under a broad trim without checking the fixing and cleaning access.
Install and Measure in the Right Order
1. Release the pieces against the current drawing
Check piece marks, quantities, cover size, nosing direction, top face and fixing positions. Do not mix similar-looking pieces before confirming that they are interchangeable.
2. Dry-fit the actual stair
Place the cover without final adhesive or tightening. Check both ends, the front edge, side gaps, joint positions and the next riser. Record the existing top and the un-fixed cover top. The dry fit should reveal interference before a hole or adhesive bed is committed.
3. Record the installed fixing basis
For a bonded cover, confirm the substrate preparation, adhesive, quantity, open time, working time, clamping and cure condition. For mechanical fixing, confirm the actual fastener, hole, washer, access and edge distance. A combined system must state which component performs which role.
4. Fix a representative piece first
Install and inspect the first representative piece before completing the flight where the method allows. Check seating, edge contact, joint line and nosing projection. If the first piece does not match the dry-fit assumption, stop and review the cause.
Keep the stair out of service until the approved adhesive has reached its specified cure condition, mechanical fixings have been checked and the installation has passed the agreed inspection. A surface that looks dry is not automatically ready for traffic.
5. Re-measure the finished level
After fixing, measure the completed cover top and the adjacent riser or landing at the agreed positions. Confirm that cured adhesive, compressed backing or an inserted fixing has not changed the expected level.
6. Walk the completed flight
Inspect every tread and the whole route:
- no raised corner, rocking tread or loose end;
- nosing lines are consistent and the projected edge is as drawn;
- joints are level, intentional and cleanable;
- side gaps and cover ends are finished;
- first and last transitions are safe and complete;
- fixings are present, seated and accessible for inspection;
- no material or adhesive blocks the intended drainage path.
Know When the Installation Must Stop
Stop and request a review when:
- the existing substrate cannot hold the fixing or has deteriorated;
- the cover cannot sit flat without force;
- the finished rise or landing transition is unacceptable;
- the nose projects into the riser or creates a new obstruction;
- the joint or side condition has no approved finish;
- a cut or drilled area is damaged;
- the installed piece rocks or has a hollow, unsupported contact;
- the site geometry differs from the approved drawing.
Do not solve these conditions with extra adhesive, longer fasteners, packing strips or a second local cover. Those measures can hide the actual mismatch and make the next inspection harder.
Prepare the Installation Record
Keep a record that connects the prefabrication and site conditions:
| Record field | What it should show |
|---|---|
| Stair and piece mark | Flight, level, step and unique cover ID |
| Existing top | Measured substrate level and condition |
| Product basis | Cover construction and agreed finished top |
| Dry fit | Fit, corners, joints, side gaps and open issues |
| Fixing | Product, pattern, material and installation method |
| Finished top | Post-installation level and observed variation |
| Nosing | Edge, projection and alignment |
| Transitions | First and last step relationship to landings |
| Inspection | Photos, responsible person, date and revision |
This record is also the basis for later maintenance and inspection. Without a baseline, a later photograph of a worn edge cannot show whether the cover height or installation line changed.
What to Send for a Height and Transition Review
Send:
- existing tread material and condition;
- measured existing top levels;
- proposed cover and fixation;
- actual or required finished top level;
- riser change through the flight;
- first and last landing details;
- nosing construction and projection;
- joint plan and side gaps;
- piece marks, quantity and current revision.
Photos should show the whole flight and close details of the first and last steps. A photograph of the cover sample alone cannot establish that the stair transition works.
Final Installation Check
Before handing over the stair, confirm:
- the existing and finished tops are recorded from one datum;
- every riser change has been checked;
- both landing transitions are complete;
- the nosing line and projection agree with the drawing;
- every joint and side gap has an approved finish;
- the cover sits flat and every fixing is accessible;
- no temporary packing or forced tightening is hiding a mismatch;
- the final condition and photo record are retained with the piece schedule.
The result should be a complete walking stair, not a set of covers that were merely fixed in place.
Send the survey
Show the Existing Top and the Finished Stair
Include both the substrate and the geometry you expect after installation.
- Molded and pultruded grating produced in house
- Full panels or factory cut-to-size pieces
- No fixed minimum order quantity
Fiberglass Stair Cover Height FAQs
How much does a fiberglass stair cover add to stair height?
Should I measure the cover alone or the finished stair?
Do I need to cover every tread in a flight?
How should the first and last steps be checked?
Where should joints be placed?
What should I do if one end of a cover sits high?
Can the installer adjust the finished height after fixing?
What information should be sent before a cover is fabricated?
This content was prepared and reviewed by Dengtai Industry’s technical and production team using the project conditions, available product data and applicable documents. Limits that require design, testing or approval are identified in the content. Content last checked: