FRP grating replacement review
Replacement FRP Grating Panels: Matching the Finished Level
A replacement panel can share the same outside length and width and still sit high, low or incorrectly supported. Match one finished-surface datum, the actual product depth, support seating, bearing direction, cutouts, edges, joints and clips. Then dry-fit and record the installed level before release.
Prepared by
Dengtai Industry
Published
·
Reviewed

The replacement is part of the installed walkway system, not a loose rectangle. Application reference: Dengtai Industry.
The Short Answer: Match the Installed System
The easiest replacement order says “same size, same yellow.” It leaves most of the failure risk unaddressed.
The replacement must fit the installed system:
- the correct product family and construction;
- actual outline and depth;
- mesh or bearing-bar direction;
- support contact and clear span;
- cutouts, notches and edge geometry;
- joint positions, alignment and gap;
- clip or fastener condition; and
- the finished top-surface level.
A panel can have the correct outside length and width and still create a step because the actual depth differs, because a support is high, because debris prevents seating, because the pultruded bearing bars have been rotated or because the clip is holding the panel above the intended bearing surface.
Start with one question: what makes this location acceptable after reinstatement? Then define the measurements and records that prove it.

Investigate Why the Existing Panel Failed
A replacement order should begin with the reason for replacement. Otherwise the new panel may repeat the same failure.
Check for:
- impact damage or dropped objects;
- cracks, broken bars or damaged intersections;
- loose, deformed or missing clips;
- an unsupported or oversized cutout;
- point loading or an unplanned support change;
- chemical attack, heat, fire or another exposure issue;
- contamination or blocked drainage;
- repeated repair or an unknown previous modification;
- a support that is high, low, missing, dirty or damaged; and
- an installation that was forced into position.
Not every condition is visible from above. The maintenance and service-life guide explains why the observed damage must be connected to service conditions and inspection. A photo can show the result; a responsible reviewer still needs to determine the cause and the safe response.
The QY repair-or-replacement checklist makes a similar peer point: product identity, panel marks, support, damage, clips, load requirements and site photos should be reviewed together. A replacement quotation should not assume that the old product is interchangeable.
When the Original Product Record Is Unknown
An unmarked or undocumented panel is not a reason to choose a visually similar replacement.
Capture:
- measured outline and actual depth;
- mesh or bearing-bar spacing;
- bearing direction and visible face;
- support contact, clear span and clip type;
- cutouts, edges and any previous repair; and
- a retained physical sample where practical.
Those records support review of a candidate product, but they do not by themselves prove equivalence. The responsible reviewer must compare the measured construction with the required duty and decide whether the product record is adequate. A photograph can show the family and visible condition; it cannot identify an unknown series with certainty.
Establish One Finished-Surface Datum
The measurement should not begin at the top of whichever panel looks convenient.
Define a named datum that can be used consistently:
- a project survey reference or level;
- a fixed structural member;
- a stable finish elevation agreed by the installation reviewer; or
- another documented reference outside the panel being replaced.
Then measure the top surfaces of:
- the affected panel;
- both adjoining panels where present;
- the surrounding walkway or landing; and
- the proposed replacement after dry-fit.
Record actual values and locations. A single “high” or “low” judgment cannot show a twist, local step or support problem. The measurement method and its limit should match the project’s required precision.
The finished surface may also be worn. The existing top is the condition to be reinstated, but it is not automatically the original delivered thickness or color reference.
Measure Actual Thickness, Not Only the Product Name
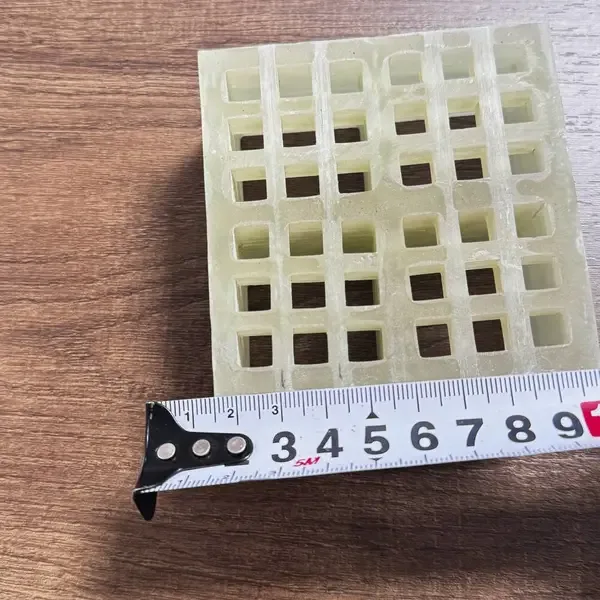
Panel product names may refer to nominal depth. The actual existing product and the proposed replacement should be compared at defined positions with an appropriate measuring method.
Record:
- measured values;
- positions of measurement;
- existing surface condition;
- nominal product description; and
- any tolerance agreed for the replacement.
This does not mean that any measurable difference automatically causes rejection. It means the difference must be evaluated against the support, joint and project acceptance condition. A nominal “same depth” cannot prove that two products will produce the same finished level.
Check the Support Before the New Panel
The support is the other half of the finished level.
After the area is made safe and the existing panel is removed, inspect:
- support locations and elevations;
- bearing surfaces;
- debris, coatings, corrosion or contamination;
- missing or damaged support members;
- gaps or high points;
- bearing width;
- clear span; and
- the condition and position of clips or fasteners.
Check the intended bearing points for coplanarity, not only a single elevation reading. The replacement should dry-fit without rocking. Also check the panel for bow or twist: a support that is out of plane and a panel that is not flat can produce the same visible gap, but they require different corrective action.
The Weldlok installation guidance describes the practical rule that framing should be correct, clean and level before panels are seated. It also notes that a panel fixed over a misaligned support cannot be corrected by adding pressure. The F1 Composite installation guide likewise connects support level, dry-fit and post-fixing inspection.
Our factory scope can review the grating product and fabricated piece. Design and correction of the structural frame, support elevation or anchorage belong to the responsible project party unless separately agreed.
Check the Surrounding Panels and Transitions
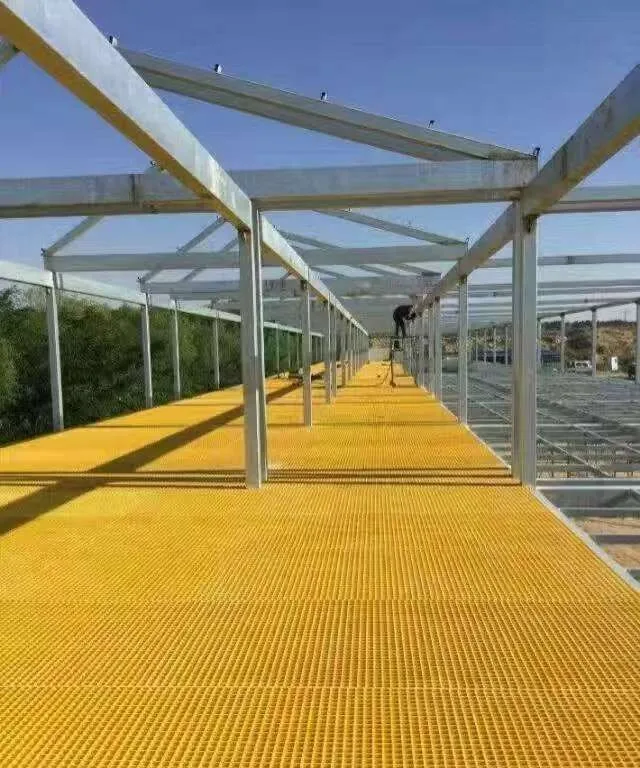
A replacement may appear level against its immediate neighbour and still create an unacceptable transition at a third edge.
Dry-fit and inspect:
- the joint step on every side of the replacement;
- the surface level at a walkway, stair landing or change of direction;
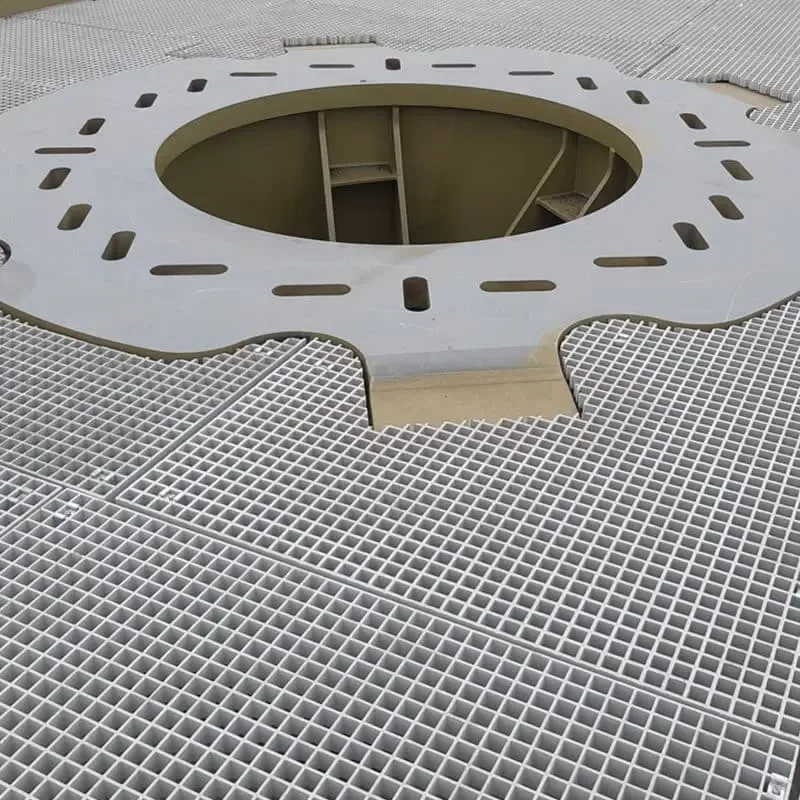
- the finish around a cutout;
- the edge under a guardrail post or other penetration;
- the gap and alignment against removable panels;
- the route across an expansion or movement interface; and
- any drainage or cover transition that uses the panel surface.
The surrounding panels are evidence too. If one neighbour is already high, low, loose or damaged, measuring only the replacement can make the new piece appear wrong. Record the existing condition before removing the old panel.
Do not correct a transition by grinding or deforming the new panel unless that operation is part of an approved product method. A guardrail post opening, support frame and joint detail also belong to their responsible design scope; the replacement panel quote does not silently approve them.
Preserve Bearing Direction and Panel Orientation
Directional products add a hidden replacement condition.
Pultruded grating carries load mainly along its bearing bars. The bars must meet the intended support arrangement. Rectangular molded grating can also have a stronger direction. Rotating the panel may make the outer rectangle fit while the load path is no longer the original.
Mark the reference edge and top face before removal. Record the bearing direction on the replacement drawing. The factory should provide a mark that remains understandable after packing and site handling.
For a whole panel replacement, compare both:
- the outline orientation; and
- the bearing-bar or strong-mesh orientation.
Linking the pultruded bearing-bar guide at quotation helps keep direction in the same review as size.
Match Every Opening and Finished Edge
The replacement outline needs a datum and a complete opening schedule:
- shape and clear size;
- location from the common reference;
- required clearance;
- bars or cross rods interrupted;
- remaining edge or support condition;
- cut-edge treatment;
- notch or removable section; and
- quantity.
Do not assume the old cutout is the required detail. If equipment or the support has changed, the replacement should follow the current approved requirement rather than reproducing the existing panel exactly.
If the old cutout contributed to damage or unsupported bars, treat this as a design condition to resolve before ordering. A neater edge alone may not address the cause.
Distinguish a Spare From a Finished Replacement
A “spare panel” can mean several different things:
| Spare type | What it is | What it is not |
|---|---|---|
| Blank stock panel | An uncut panel with a known product construction | A panel ready for the affected opening |
| Pre-cut spare | A finished piece made to an approved position and revision | An interchangeable rectangle for every similar bay |
| Emergency temporary panel | A short-term safe measure under site control | A permanent replacement without the required review |
| Old removed panel | A used object with unknown or changed history | A known-good stock replacement |
For any spare, retain product type, actual dimensions, direction, marks, storage condition and the specification it was intended to satisfy. Keep it supported and dry, without placing heavy items on top.
If the spare’s blank geometry has to be modified, link it to the field modification traceability chain.
Dry-Fit Before Final Fixing
Dry-fit the replacement before the area is accepted:
- support surfaces clean and correctly prepared;
- panel lowered into the intended orientation;
- top surface compared with the common datum;
- bearing contact checked along the intended supports;
- openings, notches and edges checked;
- adjoining joints checked for alignment and gap;
- clip and fastener positions checked for access and fit; and
- visible face and piece mark checked.
If the panel must be forced, stop and inspect the cause. It may be debris, an incorrect support, a high point, a wrong outline, a rotated directional product or a different thickness.
Do not close the gap by over-tightening a clip. The correct fixing should hold a correctly seated panel, not deform it into position.
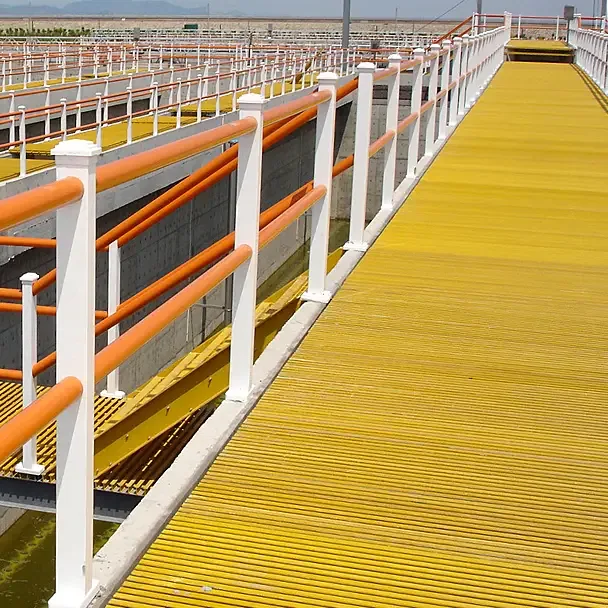
Record the As-Built Level
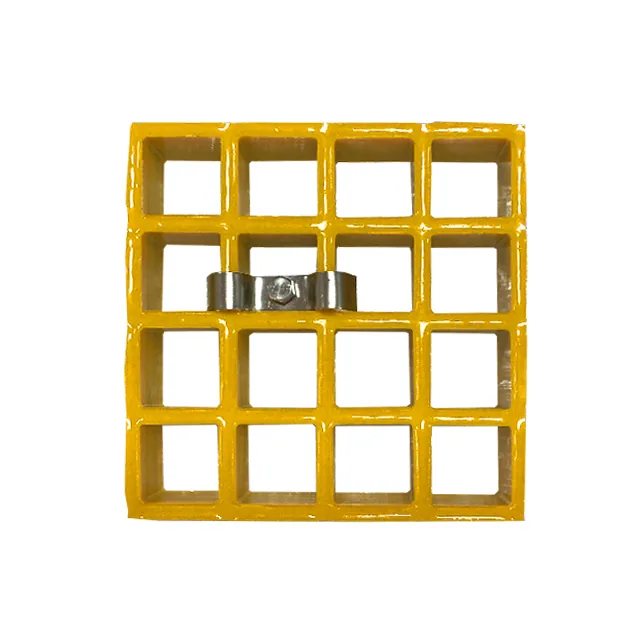
The installation record should identify:
- replacement piece or panel ID;
- final location;
- top-surface result from the common datum;
- step to adjacent pieces;
- joint gap and alignment;
- bearing direction;
- cutout and edge condition;
- clip type, material, quantity and location;
- any open support or fixation item; and
- responsible inspector or approver.
Use photographs to preserve context: the piece mark, the level reference, the support contact, the adjoining joint and the final walking surface. A photograph without a scale or location is supporting evidence, not a measurement.
The panel joint guide explains why the joint’s edge support, connector and gap remain separate conditions. Those checks finish the replacement record.
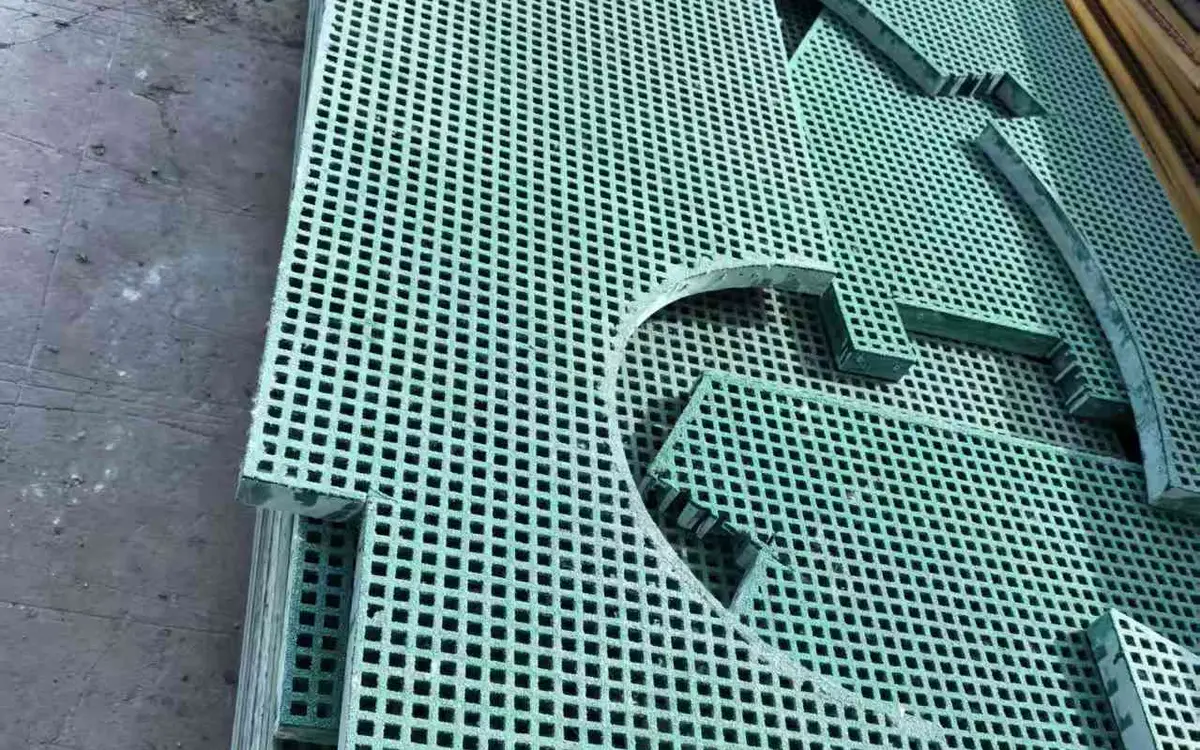
Our Factory View
We can review the existing product description, measured outline, openings, direction and proposed replacement construction. We can fabricate and mark a finished panel to an approved revision and identify it through packing.
We cannot determine the installed finished level from a panel drawing alone. The support condition, installation sequence and field measurement determine whether the replacement seats correctly. We do not recommend using clips to correct a structural or level defect, and we do not diagnose the old panel’s failure from photos without the responsible site review.
Replacement vocabulary
Thirteen Terms That Define an FRP Grating Finished-Level Match
The datum, product, support, joint and installed result all describe different parts of the replacement.
- Finished-surface datum
- The common elevation or reference plane used to judge the top surfaces of the existing panel, replacement panel, adjoining pieces and surrounding approach.
- Finished level
- The actual top-surface position and local step condition after the replacement is seated and fixed. It is not the same as the nominal panel thickness.
- Actual thickness
- The measured depth at defined positions on the existing and proposed panels. Nominal depth names can be similar while actual products or tolerances differ.
- Support seating
- The condition in which the panel bears on the intended support surfaces without high points, debris, gaps or forced distortion.
- Support coplanarity
- The condition in which the intended bearing surfaces lie in the required common plane, allowing the panel to seat without rocking or clip pressure closing a gap.
- Panel flatness
- The actual regularity of the replacement panel when supported as intended. A flat outline check does not reveal local high points, bow or twist.
- Unknown-product route
- The controlled process used when the original series, supplier or record is missing. It relies on measured construction evidence and project review rather than a photo match.
- Bearing direction
- The main load-spanning direction, especially important for pultruded and rectangular-mesh products. It must remain visible on the replacement record.
- Finished edge
- The cut, molded or otherwise completed edge that contributes to the panel outline, joint, opening and walking-edge condition.
- Joint condition
- The support, alignment, gap, connector and fixing state where the replacement meets an adjoining panel or structure.
- Dry fit
- Placing the replacement in its intended position before final restraint to check seating, step, gap, cutouts, edges, direction and fixing access.
- Blank spare panel
- An uncut panel held as stock. It is not a ready replacement until its geometry, openings, orientation and approval match the required location.
- Replacement record
- The product, existing-condition evidence, measured dimensions, drawing revision, dry-fit observations, installed level, fixing result and release status.
Level questions
What Must Be Compared Before a Replacement FRP Grating Panel Is Ordered?
Match the physical product and installed support condition, not the outside rectangle alone.
| Replacement question | Controlled evidence | Not enough on its own |
|---|---|---|
| Will it fit the opening? | Actual outline, datum position, cutouts and edge geometry | Nominal panel length and width |
| Will the top surface align? | One finished datum, actual thickness and support seating | “Same thickness” from an old invoice |
| Will it bear correctly? | Support contact map, span and existing bearing direction | The panel touching somewhere underneath |
| What if the old product is unidentified? | Measured construction, physical sample, direction, support and responsible verification | Selecting a visually similar panel from a photo |
| Will the bars run correctly? | Product type, bar or mesh direction and reference edge | Fitting the rectangle without checking rotation |
| Can the clips be reused? | Clip condition, type, fit, support lip and fastener condition | Reusing every fastener because it was already there |
| Is the new panel accepted? | Dry-fit, final level, joint, fixing and reinstatement record | Appearance after the last clip is tightened |
Product conditions
How FRP Grating Construction Changes the Replacement Match
Molded, pultruded, mini-mesh, covered and spare panels require different records.
| Existing product | Replacement question | Common wrong assumption |
|---|---|---|
| Molded square-mesh panel | Actual depth, grid pitch, outline, support contact and edge condition | A full square mesh panel is interchangeable once the outer size matches |
| Molded rectangular-mesh panel | Stronger mesh direction, orientation and support under the panel | The rectangle can be rotated because the outline still fits |
| Pultruded panel | Bearing-bar direction, end contact, cross-rod position and panel width | Nominal depth proves the load path matches the existing piece |
| Mini-mesh panel | Upper and lower grid, actual depth, openings, support and fixing contact | The smaller top opening makes any standard grating panel equivalent |
| Covered grating | Base depth, cover thickness, overall finished height and edge joint | Matching the base panel ignores the visible cover height |
| Blank spare panel | Stock identity, product row, dimensions, direction and storage condition | A blank panel is already a finished replacement |
Replacement register
Pre-Replacement Dimensions and Finished-Level Check Table
These fields connect the affected location, unknown-product route and dry-fit result to the released installed panel.
| Replacement record | Required value | Why it matters |
|---|---|---|
| Affected location | Bay, piece ID, support, joint and surrounding panels | Defines which installed condition the replacement must match |
| Existing product | Molded or pultruded, depth, mesh or bar pitch, surface and direction | Prevents a same-size but different construction substitution |
| Product-record status | Known series, incomplete record or unknown product | Selects the evidence and approval route before substitution |
| Existing condition | Damage, wear, level, support and clip observations | Distinguishes the old panel state from the original design state |
| Finished datum | Named reference and measured surface positions | Makes level comparisons repeatable |
| Actual dimensions | Outline, thickness, openings and edge geometry | Captures the object to be replaced |
| Support seating | Support locations, bearing contact, debris and irregularities | Shows whether the new panel can seat without force |
| Coplanarity and flatness | Intended bearing surfaces, panel bow or twist and dry-fit contact | Separates a support alignment problem from a panel geometry problem |
| Direction | Bearing bars, strong mesh direction and reference edge | Prevents a rotated panel from passing an outline check |
| Joint and fixing | Gap, alignment, clip type, hardware and fixing locations | Connects panel replacement to the surrounding installation |
| Dry-fit result | Step, gap, contact, opening fit and access before final fixing | Catches a support or geometry problem before the area is closed |
| As-built release | Final location, installed level, fixing, photographs and open items | Closes the record on the actual reinstated panel |
Replacement gates
When an FRP Grating Replacement Panel Is Ready to Order
Identify the cause, measure the whole product and confirm the support and reinstatement condition.
Specify this if…
- The affected piece and surrounding layout are identified.
- The existing product construction and direction are known.
- If the original series is unknown, measured construction and a physical sample are available for verification.
- The support surface can be inspected after safe removal.
- Dimensions are measured from one common datum.
- Actual thickness and panel construction are checked, not only nominal size.
- The openings, edge geometry and joint condition are recorded.
- A dry-fit and final level check are planned.
Look elsewhere if…
- The replacement is ordered from outside dimensions alone.
- An unidentified old panel is declared equivalent from a photograph.
- A blank spare is assumed to be a ready-to-fit panel.
- The old panel failure cause is not investigated.
- The frame is out of level and the clips are expected to pull the panel into place.
- Existing clips are reused without checking fit and condition.
- The pultruded bearing direction is omitted.
- No one can inspect support and installation after the replacement arrives.
Reinstatement sequence
From Existing Panel Evidence to a Released Finished Level
Diagnose, measure, seat, dry-fit, fix and record the actual replacement condition.
Follow the site safety process and preserve the existing panel, support and joint evidence.
Record damage, wear, support, clips and the likely reason a replacement is needed.
Use the known product record or, when it is unknown, measured construction, a physical sample and responsible review.
Establish a common finished-surface and plan reference before measuring the replacement.
Record outline, actual depth, openings, edges, direction, support and joint conditions.
Remove debris and resolve high or low support seating within the responsible scope.
Check contact, level, gaps, openings, direction and fixing access before final restraint.
Install the approved clip and fastener system without forcing the panel into level.
Record final elevation, step, gap, fixing, piece identity and any open item.
Replacement RFQ
What to Send for an FRP Grating Level-Match Review
The listed records make the replacement question measurable for factory and installation review.
- Affected area — Project, location, surrounding piece IDs, support and joint reference.
- Existing product — Product construction, depth, mesh or bar spacing, resin and surface.
- Product-record status — Known series, incomplete record or unknown product and the verification route selected.
- Physical reference — Retained sample, measured construction and readable marks when the original record is incomplete.
- Existing condition — Damage, wear, contamination, exposure and previous repairs.
- Failure evidence — Impact, loose clips, unsupported opening, level issue or other possible cause.
- Plan dimensions — Outline, opening positions and edge geometry from one datum.
- Actual depth — Measured existing and proposed values at defined positions.
- Direction — Bearing bars or stronger mesh direction, reference edge and top face.
- Supports — Contact locations, elevations, debris, gaps, bearing width and clear span.
- Coplanarity — Intended bearing surfaces, support high points, gaps and the agreed level-check method.
- Panel flatness — Bow, twist, local deformation and dry-fit contact before final fixing.
- Joints — Adjacent panel edges, gap, alignment and connector condition.
- Fixings — Clip type, material, quantity, fastener condition and support fit.
- Replacement type — Finished panel, blank spare, pre-cut spare or emergency temporary panel.
- Acceptance — Dry-fit result, final level, step, gap, fixing and release evidence.
Replacement schedule
What the FRP Grating Replacement Detail Should State
The approved record should resolve form, support, level, fixing and final evidence.
Request a Project Quote| Specification | Value |
|---|---|
| Finished datum | One named common reference Existing and replacement levels should be judged from the same basis. |
| Product | Matched construction and direction Nominal outside size does not approve a different grid or bar pattern. |
| Product record | Known series or measured unknown-product route A physical sample and construction evidence support review when records are incomplete. |
| Thickness | Measured actual depth Keep defined measurement positions in the record. |
| Support | Clean, defined seating Clips should not compensate for an uneven support. |
| Coplanarity | Agreed support-plane check Intended bearing surfaces should allow seating without rocking. |
| Panel flatness | Dry-fit bow, twist and contact result Record the actual panel condition before fixing. |
| Openings | Datum position, clear opening and edge Include every cutout and notch that affects fit or support. |
| Joint | Approved gap and alignment The replacement should restore the layout detail at both adjoining edges. |
| Fixing | Approved clip and hardware Reuse only after checking condition and compatibility. |
| Release | Dry-fit plus installed condition Record final step, gap, contact and open items. |
Replacement review
Send the Existing Panel and Support Condition
Include the failure evidence, finished datum, direction, openings and intended replacement type.
- Measure from one finished datum
- Show support and joint conditions
- Explain why the old panel is being replaced
FRP Grating Replacement Panel Level Questions
Can I replace FRP grating by matching the outside dimensions?
What is a finished-level match?
Why can one millimeter or a small thickness difference matter?
What can I do if the original FRP grating series is unknown?
What does support coplanarity mean in a replacement check?
Can the clips pull a low replacement panel into level?
Should I check the replacement panel for flatness or twist?
Do I need to match the bearing direction?
Can I use a blank spare panel as an immediate replacement?
Should unused old clips be reused?
Why does the old panel's failure matter?
Can photos confirm the right replacement?
What should I send for a replacement quotation?
Final release rule
Release a Replacement Only When Product and Finished Level Agree
The final control separates a confirmed product from an unknown record and prevents clips from hiding support or panel geometry problems.
- Final release rule — Measure from one datum, verify the product and support, dry-fit without force and release only when the installed step, gap, contact and fixing match the approved detail.
- Keep missing records visible — An unknown original series requires measured construction, a physical sample where practical and responsible review. Colour and a photograph do not prove equivalence.
- A clip is not a level correction — A clip restrains a panel to a support. It should not close a gap caused by a support that is out of plane or a replacement panel that is bowed or twisted.
- Installation and retrofit reference — Weldlok connects support preparation, panel cutting, fixing and retrofit planning. Open the Weldlok installation guide
- Bearing and cut-condition reference — CBSI connects complete bearing support, bearing direction and cut-edge protection. Open the CBSI installation guidelines
- Replacement evidence reference — QY shows the product, damage, support, clip and marked-photo evidence needed for replacement review. Open the QY replacement checklist
- Support seating and inspection reference — F1 Composite connects support checks, bearing direction, cutting and post-installation inspection. Open the F1 Composite installation guide
This content was prepared and reviewed by Dengtai Industry’s technical and production team using the project conditions, available product data and applicable documents. Limits that require design, testing or approval are identified in the content. Content last checked: